MGB GT Windscreen (Windshield) Refit
Prologue
The rubber surround on my '73 GT's windshield was tatty, and a piece of chrome trim was missing from one side. It needed replacing. I ordered a new windshield rubber from Moss, and planned to do the replacement one weekend.
This proved to be a hopelessly optimistic idea. Replacing the rubber and chrome trim is a lengthy, difficult and frustrating job. It is not for the faint of heart. It took me several weeks, off and on, before I was finished. This web page describes the process I used. There may be better ways, but this is what worked for me.
You will need lots of patience if you attempt this. It's an unusual job in that it gets progressively more difficult as you go along. The most difficult part comes right at the end: reattaching the chrome trim.
Tools and Materials You Will Need
1) Washing up liquid (to lubricate the rubber and chrome pieces)
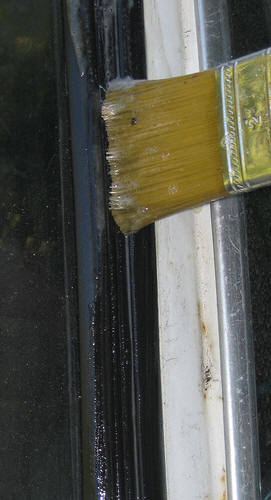
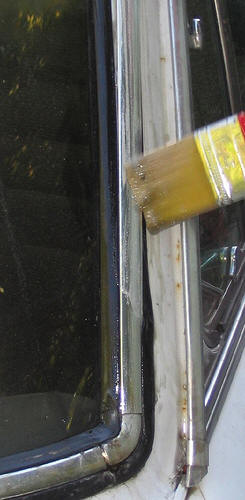
2) Old paintbrush for applying the lubricant
3) Windscreen locking strip tool
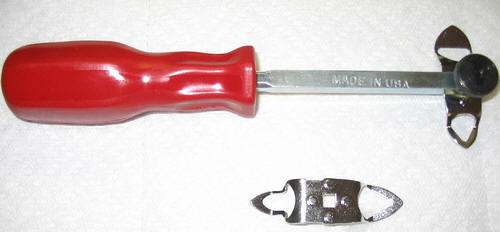
(These cost about 10$ online. I have heard of people who made their own tool, but the professional tools are so cheap, why bother. You need this tool, unless you have bionic hands and the forearm strength of Charles Atlas)
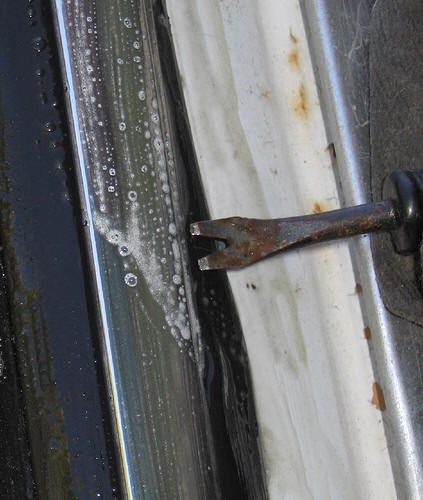
4) Small nail puller tool
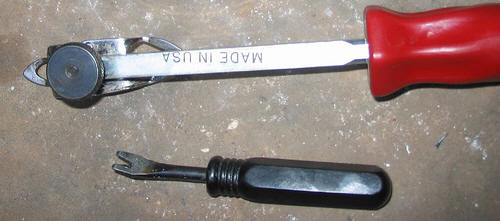
(The black handled tool below. This tool will be used to lip the rubber over the chrome trim)
5) Stanley Knife or other sharp utility knife
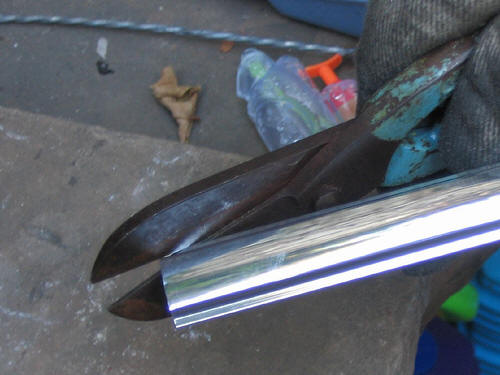
6) Tin snips (for chamfering chrome trim lips)
7) Windshield rubber (from Moss, Victoria British, etc.)
8) Locking strip rubber (ditto)
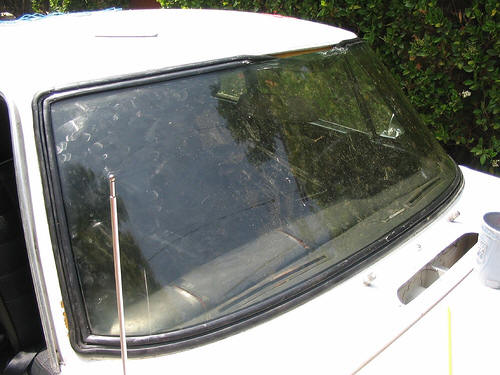
Removing the old rubber
This is the first part of the job, and is very easy. Just cut carefully around the chrome trim with a Stanley knife, pull the chrome strips away *very carefully* (don't bend them), pull the rubber pieces off and away. At some point you will be able to remove the glass, by gently thumping it on the interior, so that it pops out. Put your gloves on, remove the glass and place it somewhere safe. Then remove the rest of the rubber. This leaves you with the denuded metal windshield surround:
Clean the exposed areas thoroughly.
Placing the new rubber
Insert the new rubber in the windshield opening, fitting it to the surrounding flange all around. It may well appear to be too large, and may droop down from the top lip, under gravity, but don't worry too much. The important part is to engage the bottom lip nicely at this point.
Placing the windshield
This is where an extra pair of hands may be useful. I did it on my own, but I think it would be easier with help.
Clean the glass carefully, especially around the edges, and remove any bits of old rubber etc, so that the edge is nice and smooth.
Brush washing up liquid along the groove in the rubber on the lower edge of the windshield, the groove that the glass will be inserted in.
Wearing gloves, pick up the glass, and position it so that the lower edge engages in the lubricated slot in the rubber. Easier said than done! It helps if you are working on a hot day, so that the rubber is soft and pliable.
Once you have it approximately engaged in the lower slot, let it rest against the outside of the rest of the rubber. Now you have to somehow push the glass into the rubber groove, all the way around.
(I didn't use the nylon cord recommended by others. I found that it didn't help
at all. It takes ages threading it into the windscreen groove, and once in
position, with the windscreen located in the bottom groove in the rubber,
whenever I pulled on it, it would just dislocate itself from the groove, and
come free inside. Maybe the nylon cord I was using was too slippery.)
So I first engaged the bottom edge of the windscreen, then I started teasing the
windscreen into the groove on each side. I used a short piece of thin smooth
metal rod with a 90 degree bend on one end for this: everything else I tried
wasn't strong enough (chopsticks etc.). I realise it's risky using metal against
the glass, but I was pretty desperate, and it turned out alright.
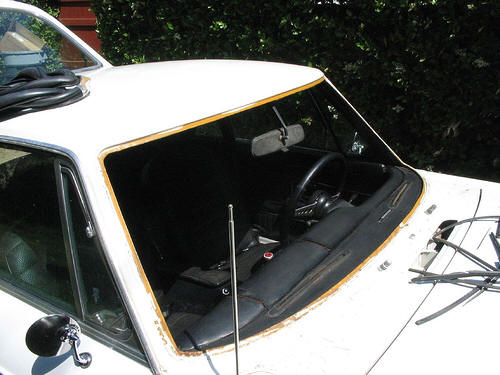
After working around, using quite some force to push the windscreen inwards as I
pulled the lip of the rubber over it, and on the top edge, simultaneously
engaging the rubber in the lip of the aperture itself, I was left with a length
of about 6" at the top middle of the screen:
You don't want this! It's impossible to work with
the rubber in the top center: it's too hard to reach with both hands. Instead,
make sure you work the rubber so that you end up with the remaining disengaged
piece at one side of the windscreen, rather than at the top. That way, you can
get one hand to it on the inside of the car, and another to it on the outside.
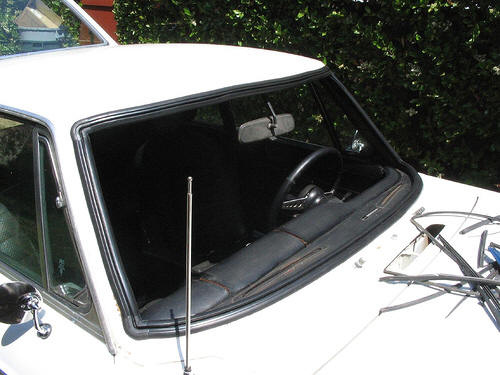
Using lots of washing up liquid, and suitable incantations of four letter words,
you will eventually be able to lever the the rubber over the edge of the glass.
Time for a cold beer.

Inserting the Locking Strip
The locking strip is a long piece of rubber beading that needs to be inserted in the groove that runs all around the rubber windshield surround. The locking strip needs to be inserted the right way up: the rounded part needs to be facing outwards.
I started it off by hand, pushing it in half way up the left hand side of the screen, and using lots of lubrication I was able to push it in with my thumb most of the way up that side. Pushing the strip in requires that the rubber surround is spread slightly, so that the strip locks into the groove. Once you get to a corner, it gets to be semi-impossible to push the strip into the groove.
This is where you need the locking strip tool. With that tool, you thread the strip through the hole in the tool's rounded end, and then the end of the tool is pushed into the groove, which causes the rubber surround to spread apart. As you push along, the strip is pulled through the hole and forced into the widened groove by the tool. This is a very satisfying procedure, and a definite pleasure compared with the rest of this job!
Replacing the Chrome Trim
At this point you might be forgiven for thinking the job is almost over. Guess again! You are now going to embark on the hardest part of the job, reinserting the chrome trim.
Be very careful working with the trim, as it is easily bent and easily scratched.
First of all, insert the four corner pieces of trim. Always use a lot of lubrication when working with the trim. Insert the inner edge of each corner piece into the slot in the rubber surround, and then carefully pry the rubber over the trim edge on the opposite, outer, side. You will need to press down hard on the trim while you do this.
Prying the rubber over the edges of the chrome trim is the key to success. You have to work slowly and unambitiously. Don't hurry it. Here are some photos of how I inserted one of the side chrome strips: the method is the same for the other strip pieces too. The order I recommend is:
a) insert four corners
b) insert lower strip
c) insert upper strip
d) insert side strips
For each piece of chrome strip, chamfer the end lips with some tin snips (not necessary for the corner pieces)
Apply lots of lube to the rubber:
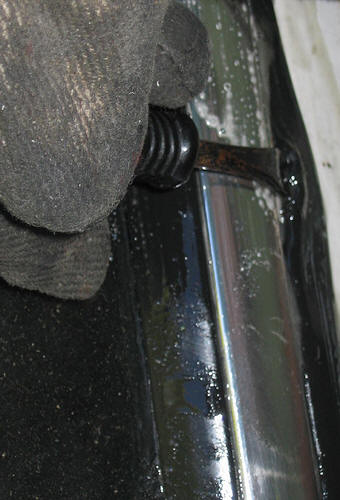
Angle the chrome strip, and insert it in the slots, and push down *carefully* so that the strip meets the corner piece
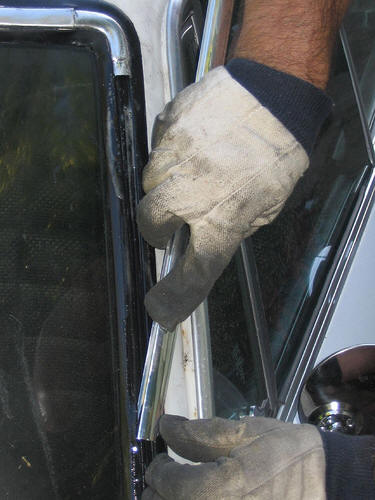
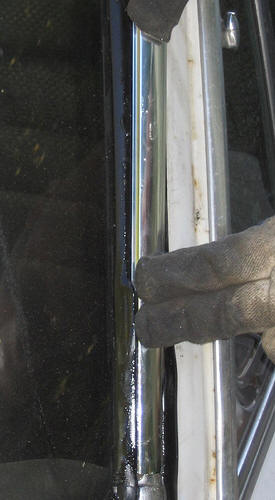
The strip is now in position at one end, and engaged in the slot on both sides. More lubrication.
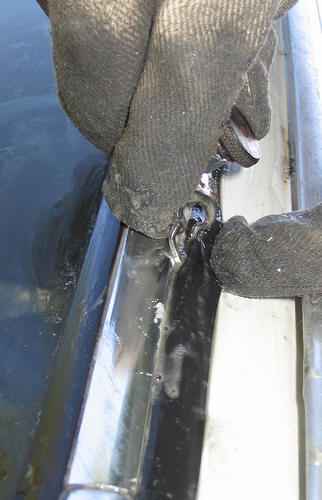
Take the nail puller tool, place it against the rubber, and work it underneath the trim, as close to the already lipped rubber as possible, and lever the tool so that a new length of the rubber is pulled up and lipped over the trim.
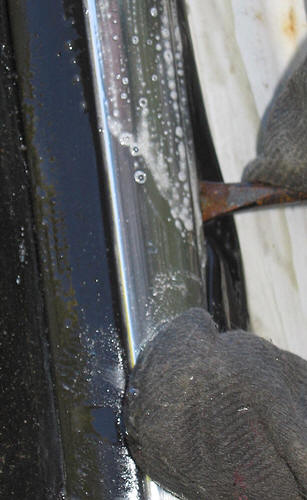
As you work along the strip, it will become progressively easier to lip the rubber over. Every now and again you can run the other tool along the lipped edges to ensure they are nicely engaged
Finally, you will reach the end of the strip, and it will be engaged fully, lipped in the rubber. Time for another cold beer. Then there are the other strips to do :-)
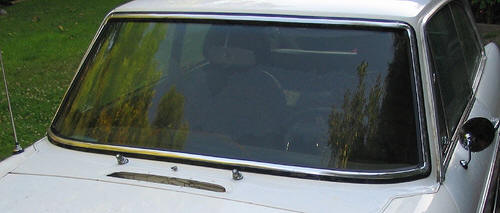
Finished Result
It is hard to describe the sense of euphoria when the last piece of chrome trim goes in. Euphoria, mixed with relief that you never expect to have to do this job again!
Epilogue
I initially worked from instructions found here: http://www.mgcars.org.uk/cgi-bin/gen5?runprog=mgoc&a=&p=emg/mgbgtwind.html
Many thanks to everyone who offered advice, support and encouragement on the MG Experience www.mgexperience.net and British Car Forum www.britishcarforum.com forums.